Author: fjgraf

  • Debian + Apache + mariadb + letsencrypt + wordpress

    Step 1: Update Your System

    First, make sure your system is up-to-date.

    sudo apt update
    sudo apt upgrade -y

    Step 2: Install Apache

    Install Apache web server.

    sudo apt install apache2 -y

    Enable and start the Apache service.

    sudo systemctl enable apache2
    sudo systemctl start apache2

    Step 3: Install MariaDB

    Install MariaDB server.

    sudo apt install mariadb-server mariadb-client -y

    Secure the MariaDB installation.

    sudo mysql_secure_installation

    Follow the prompts to:

    • Set a root password
    • Remove anonymous users
    • Disallow root login remotely
    • Remove test databases
    • Reload privilege tables

    Step 4: Create a Database for WordPress

    Log into MariaDB.

    sudo mysql -u root -p

    Run the following SQL commands to create a database and a user for WordPress.

    CREATE DATABASE wordpress_db CHARACTER SET utf8mb4 COLLATE utf8mb4_unicode_ci;
    CREATE USER 'wordpress_user'@'localhost' IDENTIFIED BY 'strong_password';
    GRANT ALL PRIVILEGES ON wordpress_db.* TO 'wordpress_user'@'localhost';
    FLUSH PRIVILEGES;
    EXIT;

    Step 5: Install PHP

    Install PHP and necessary extensions.

    sudo apt install php libapache2-mod-php php-mysql php-mbstring php-xml php-zip php-gd php-curl -y

    Step 6: Configure PHP for Large File Uploads

    Edit the PHP configuration file.

    sudo nano /etc/php/*/apache2/php.ini

    Change the following settings:

    upload_max_filesize = 128M
    post_max_size = 128M
    max_execution_time = 300
    max_input_time = 300

    Step 7: Restart Apache

    After making changes to the PHP configuration, restart Apache.

    sudo systemctl restart apache2

    Step 8: Download and Install WordPress

    Navigate to the web directory /var/www/

    Download the latest version of WordPress.

    wget https://wordpress.org/latest.tar.gz
    tar -xzvf latest.tar.gz
    Or if it's a zip file
    unzip latest.zip
    rename the wordpress site with the domain of your wabsite
    mv wordpress mysite.com

    You might want to keep the wordpress compressed file untill next version comes up.

    From here you should be ready to go to the local ip address in your browser and finish the installation process of wordpress. If the wordpress installation opens and after putting the information to access to the database you just created for wordpress it does not connect, you will have to enter that information manually like is shown in the next step.

    Step 9: Configure WordPress

    Navigate to folder /var/www/mysite.com and create a WordPress configuration file from the sample file. Make a copy of the sample file and edit the new copy as shown below:

    cp wp-config-sample.php wp-config.php

    Edit the wp-config.php file.

    sudo nano wp-config.php

    Add your database details with the details you chose when you created the database in step 4:

    define('DB_NAME', 'wordpress_db');
    define('DB_USER', 'wordpress_user');
    define('DB_PASSWORD', 'strong_password');
    define('DB_HOST', 'localhost');

    Step 10: Set Permissions

    Set proper permissions for the WordPress files or better yet for this purpose to the www directory.

    sudo chown -R www-data:www-data /var/www/
    sudo find /var/www/ -type d -exec chmod 750 {} \;
    sudo find /var/www/ -type f -exec chmod 644 {} \;

    Step 11: Enable Apache Rewrite Module

    Enable the rewrite module.

    sudo a2enmod rewrite

    Step 11: Disable the default apache website

    sudo a2dissite 000-default.conf

    Step 12: Restart Apache Again

    Restart Apache to apply all changes.

    sudo systemctl restart apache2

    Step 13: Complete WordPress Installation

    Open a web browser and navigate to your server’s IP address. Follow the on-screen instructions to complete the WordPress installation.

    Step 14: Secure Your Server

    1. Install UFW (Uncomplicated Firewall)
    sudo apt install ufw -y
    sudo ufw allow 22
    sudo ufw allow 80sudo ufw allow 443sudo ufw enable
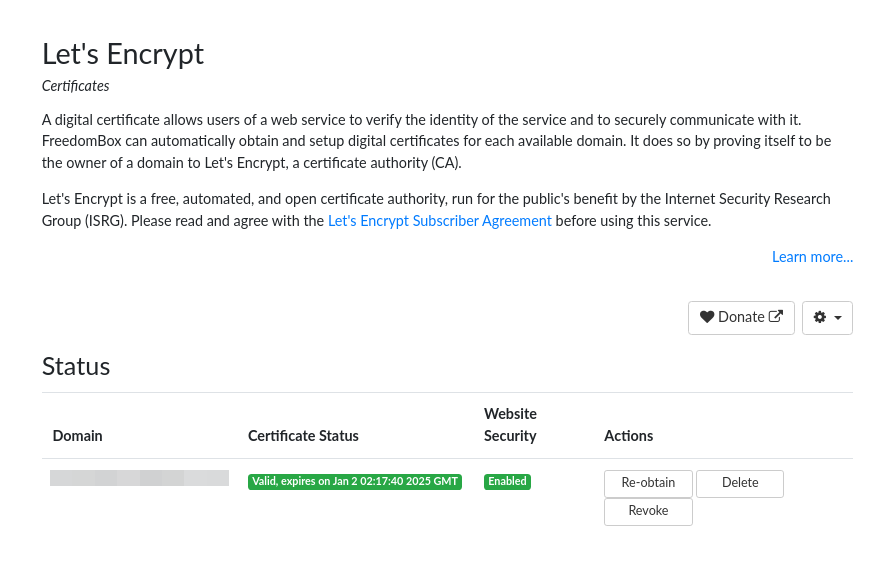
    1. Configure SSL with Let’s Encrypt

    If you have a domain name purchased or one for free, here is how to get the certificates from letsencrypt but first make sure to map your public ip address to the server running apache. Also you need to create at least a basic configuration file for mysite.com.

    Navigate to /etc/apache2/sites-available. Create and edit the configuration for mysite.com file by copying the following lines:

    nano mysite.com.conf

    <VirtualHost *:80>
           ServerName mysite.com
           Redirect permanent / https://mysite.com/
           RewriteEngine on
           RewriteCond %{SERVER_NAME} =mysite.com
           RewriteRule ^ https://%{SERVER_NAME}%{REQUEST_URI} [END,NE,R=permanent]
    </VirtualHost>
    
    <VirtualHost *:443>
           ServerName mysite.com
    
           DocumentRoot /var/www/mysite.com
    
           <Directory /var/www/mysite.com>
               Options Indexes FollowSymLinks
               AllowOverride All
               Require all granted
           </Directory>
    
     #      SSLEngine on
     #          SSLCertificateFile /etc/letsencrypt/live/mysite.com/fullchain.pem
     #          SSLCertificateKeyFile /etc/letsencrypt/live/mysite.com/privkey.pem
     #          Include /etc/letsencrypt/options-ssl-apache.conf
    </VirtualHost>
    

    NOTE: I’ve left commented the lines corresponding to SSL because when you reload the apache service in the next step it will fail because the certificates are not yet present. Using the command certbot –apache will automatically add the necessary lines in the configuration file.

    Enable the site:

    sudo a2ensite mysite.com.conf

    Reload apache

    sudo systemctl reload apache2.service

    Install Certbot.

    sudo apt install certbot python3-certbot-apache -y

    Obtain an SSL certificate.

    sudo certbot --apache
    Or
    
    sudo certbot certonly --apache -d mywebsite.com

    Follow the prompts to set up HTTPS.

    1. Regular Updates and Backups

    Set up a cron job for automatic updates.

    sudo crontab -e

    Add the following line for daily updates:

    @daily apt update && apt upgrade -y

    Happy Blogging!

  • Haproxy.cfg configuration for acme challenge – openwrt

    Updated configuration file for haproxy in openwrt. The acme-challenge was improved by having dedicated acls for each webserver containing a list of their own domains to redirect certbot traffic to another dedicated backend where those domains get their ssl certificates. Normal https traffic is redirected to individual backends.

    global
            daemon
            nosplice
    
    defaults
            log global
            mode http
            option httplog
            log 127.0.0.1:514 local0
            log /var/log/haproxy.log local0
            timeout client 30s
            timeout connect 30s
            timeout server 30s
    
    frontend stats
            bind *:9000  # You can choose any port you prefer
            mode http
            stats enable
            stats uri /haproxy  # You can customize the URI path
            stats realm HAProxy\ Statistics
            stats auth username:password  # Choose a secure username and password
    
    frontend http_in
            mode http
            option httplog
            bind *:80
    
            # Rate limiting
            stick-table type ip size 1m expire 10m store gpc0
            http-request track-sc0 src
            http-request deny if { src_conn_cur gt 100 }  # Limit to 100 requests per IP
    
            # Allow ACME challenge requests to bypass redirect
            acl acme_challenge path_beg /.well-known/acme-challenge/
            acl webserver_A_hosts hdr(host) -i site.one site.two
            acl webserver_B_hosts hdr(host) -i site.three site.four
    
            http-request redirect scheme https unless acme_challenge
            use_backend acme_backend_A if acme_challenge webservers_A_hosts
            use_backend acme_backend_B if acme_challenge webservers_B_hosts
    
            option forwardfor
            # Enhanced security headers
            http-response add-header Strict-Transport-Security max-age=31536000;\ includeSubDomains;\ preload
            http-response add-header Content-Security-Policy default-src\ 'self'
            http-response add-header X-Content-Type-Options nosniff
            http-response add-header X-Frame-Options DENY
            http-response add-header X-XSS-Protection "1; mode=block"
    
    frontend https_in
            mode tcp
            option tcplog
            bind *:443
            acl tls req.ssl_hello_type 1
            tcp-request inspect-delay 5s
            tcp-request content accept if { req_ssl_hello_type 1 }
    
            # Track session data for rate limiting
            stick-table type ip size 100k expire 30m
            tcp-request content track-sc0 src
            # Use backend based on SNI
            use_backend %[req_ssl_sni,lower,word(1,:)]_tls
    
    # Backend for ACME challenges
    backend acme_backend_A
            mode http
            option httpchk
            default-server inter 3s fall 3 rise 2
            server webserver_A 192.168.1.10:80 check
    
    backend acme_backend_B
            mode http
            option httpchk
            default-server inter 3s fall 3 rise 2
            server webserver_B 192.168.3.10:80 check
    
    # Normal HTTPS traffic to backends
    
    backend site.one_tls
            mode tcp
            option ssl-hello-chk
            server site.one 192.168.1.154:443 check
    
    backend site.two_tls
            mode tcp
            option ssl-hello-chk
            server site.two 192.168.1.55:443 check
    
    backend site.three_tls
            mode tcp
            option ssl-hello-chk
            server site.three 192.168.3.77:443 check

    Explanation of Configuration:

    • Global Section: Configures global parameters for HAProxy. daemon allows HAProxy to run in the background, while nosplice prevents it from splicing connections, which can help with HTTP processing.
    • Defaults Section: Sets default logging options, timeout settings for client connections, server responses, and logs to both a remote syslog server and a local log file.
    • Frontend stats: Provides a web interface for HAProxy statistics, requiring a username and password for access. This helps administrators monitor traffic and performance.
    • Frontend http_in: Handles incoming HTTP requests, implements rate limiting to prevent abuse, and manages redirects to HTTPS while allowing certain paths (like ACME challenges) to bypass this redirection.
    • Frontend https_in: Manages incoming HTTPS traffic in TCP mode, utilizing SSL/TLS features. It inspects SSL handshakes to route requests based on the SNI field, allowing flexibility for multiple domains.
    • Backends: Each backend corresponds to a specific service or site. Health checks are configured to ensure that requests are only routed to healthy servers, and different backends are used based on the requested hostname or path.
    • Security Headers: Adding security headers helps to protect against various web vulnerabilities, such as clickjacking and XSS, enhancing the security of the web applications served.
    • Forwarding Client IPs: The option forwardfor directive, when uncommented, allows HAProxy to append the original client’s IP address to the X-Forwarded-For header. This preserves client visibility for backend servers, enhancing logging, analytics, and functionalities that rely on the original client IP. Consider enabling this if your backend services require access to client IP information.
  • sshuttle – Transparent proxy server for VPN over SSH

    To create a hassle-free vpn connection to a remote server you need to expose port 22 in the target device. In these examples It is assumed that the remote server is either your edge device, directly connected to an edge device (like a main router) and in a DMZ or or receiving forwarded ssh traffic from your edge device.

    First, start a ssh tunnel session with the edge machine:

    sshuttle -r [user@ipaddress(edge-device)] [192.168.5.0/24 (internal server's subnet)) --dns

    For ssh port other than the default 22 type:

    sshuttle -r [user@ipaddress(edge-device):port] [192.168.5.0/24 (internal server's subnet)) --dns

    You will be asked for your local user’s password and then the password of the user of the edge device to create the vpn connection. Once that’s done, the message “Connected to server” should be shown. From here on, you can open a web browser and type the local ip address of an internal device that belongs to the subnet you specified in the previous command. For example a Proxmox administration webUI behind the router can be accessible without having to configure port forward in the router (edge device). You can log in securely without having to expose this internal server to the internet. The —dns flag is to avoid leaking your dns requests to your ISP and instead forcing it to go through the created tunnel.

    The --dns option in sshuttle is used to capture and forward DNS traffic through the SSH tunnel. When you include the --dns option in your sshuttle command, it means that DNS queries originating from your local machine will also be routed through the established SSH tunnel.

    Here is another variant which allows you to specify a desired network interface.

    sshuttle -r user@ssh_server_ip_or_hostname 192.168.5.0/24 -i enp9s0 --dns
    • -r user@ssh_server_ip_or_hostname: Specifies the remote SSH server.
    • 192.168.5.0/24: Specifies the target subnet you want to route through the SSH tunnel.
    • -i enp9s0: Specifies the network interface you want to capture traffic from.
    • --dns: Specifies that DNS traffic should also be routed through the tunnel.

    Including the --dns option is particularly useful if you want to ensure that DNS queries are encrypted and go through the same secure connection as your other network traffic. This can be relevant for privacy and security considerations.

    Keep in mind that when using --dns, it may affect your ability to resolve DNS queries locally if the DNS server on the remote network is not reachable or not configured correctly. Ensure that the DNS server specified in the remote network is accessible and properly configured.

  • Configure partition table, format and auto mount disks. MBR – EXT4

    Connect the External HDD: Ensure that your external HDD is connected to your Debian system.

    Identify the Device: Use the lsblk or fdisk -l command to identify the device name of your external HDD. It will typically be something like /dev/sdX, where X is a letter assigned to the drive.

    lsblk

    Partition the Drive with MBR: Use the fdisk command to create an MBR partition on the external HDD.

    sudo fdisk /dev/sdX

    Once inside the fdisk program do the following:

    Create the ext4 Filesystem: After creating the partition, use the mkfs.ext4 command to create an ext4 filesystem.

    mkfs.ext4 /dev/sdX1

    Replace /dev/sdX1 with the actual partition identifier you created in the previous step.

    Label the Filesystem (Optional): You can optionally label the ext4 filesystem for easier identification. Replace NEW_LABEL with the desired label for your filesystem. That can for example be the model of the hard disk or it’s purpose.

    e2label /dev/sdX1 NEW_LABEL

    Mount the Filesystem: Create a directory where you want to mount the hard disk and mount the filesystem.

    sudo mkdir /media/LABEL sudo mount /dev/sdX1 /media/LABEL

    Adjust the mount point (/media/LABEL) according to your preference.

    Now, your external HDD should be formatted with MBR and have an ext4 filesystem. If you want the drive to be automatically mounted on boot, you may need to add an entry to the /etc/fstab file which is show below.

    Automounting disk with fstab

    Identify the UUID of the Partition: Use the blkid command to identify the UUID of the partition on your external HDD. The UUID uniquely identifies the partition, and using it in /etc/fstab helps avoid issues if the disk order changes.

    Replace /dev/sdX1 with the actual partition identifier.

    sudo blkid /dev/sdX1

    Take note of the PTUUID number without quotes. It should look something like this: “c381c2aa-044b-415a-b901-2a6a374b2591“.

    Edit the /etc/fstab file: Open the /etc/fstab file in a text editor using a command like sudo nano or sudo vim. Add a new line with the following information:

    UUID=your_partition_uuid /media/LABEL ext4 defaults 0 2

    Replace your_partition_uuid with the UUID you obtained in the first step, and adjust the mount point (/media/LABEL) if needed.Example using nano:

    sudo nano /etc/fstab

    Add the line to automount the disk with default values:

    UUID=c381c2aa-044b-415a-b901-2a6a374b2591 /media/LABEL ext4 defaults 0 2

    Or with more specific options:

    UUID=c381c2aa-044b-415a-b901-2a6a374b2591 /media/LABEL ext4 rw,relatime,nofail,errors=remount-ro 0 2
    1. rw:
      • Stands for “read-write.”
      • This option allows both read and write operations on the filesystem. It specifies that the filesystem should be mounted with read and write permissions.
    2. relatime:
      • This option stands for “relative atime.”
      • With relatime, the access time of files is updated only if the current access time is earlier than the modification time or the inode creation time. It’s an optimization over the traditional atime update mechanism, helping to reduce write operations to the filesystem.
    3. nofail:
      • This option indicates that if the filesystem cannot be mounted, the failure should not be considered fatal to the system boot process. If the device is not present or there are issues with the filesystem, the system will continue booting without the specified filesystem being mounted.
    4. errors=remount-ro:
      • Specifies the action to be taken in case of errors on the filesystem.
      • If errors are encountered, the filesystem will be remounted in read-only mode (ro). This is a safety measure to prevent further potential damage and data loss in case of filesystem errors.
    5. 0 2:
      • These are the dump and pass fields, respectively.
        • The dump field (0) indicates whether the filesystem should be backed up using the dump command. A value of 0 means no automatic backup.
        • The pass field (2) is used by the fsck command to determine the order in which filesystems are checked at boot time. A value of 2 typically means the filesystem will be checked after the root filesystem.

    In summary, the options in your /etc/fstab entry specify that the filesystem should be mounted with read-write permissions, use relative atime for optimization, not be considered critical for system boot (nofail), remount in read-only mode in case of errors, and be checked after the root filesystem during the boot process.

    Create the Mount Point (if not already created): If you haven’t created the mount point earlier, create it using:

    sudo mkdir /media/LABEL

    Mount All Filesystems in /etc/fstab: To mount all filesystems listed in /etc/fstab, you can use the following command:

    sudo mount -a

    To auto mount as a non root user

    To automount a disk with specific user permissions using /etc/fstab, you can utilize the user and noauto options along with the uid, gid, and umask options.

    1. Determine the UID and GID of the user you want to mount the disk as. You can find this information by running the following commands:
    id -u username
    id -g username
    1. Determine the UUID of the disk you want to mount. You can find this information using the blkid command:
    sudo blkid
    1. Edit the /etc/fstab file using a text editor:
    UUID=your_disk_uuid /mnt/mount_point filesystem defaults,user,noauto,uid=your_user_id,gid=your_group_id,umask=022 0 0
  • Easy WAN-LAN speed test over cli

    The following two debian tools makes it very easy to accurately measure your internet connection speed as well as in your LAN.

    Measuring internet connection speed

    sudo apt install speedtest-cli

    Run it by typing:

    speedtest-cli

    Measuring LAN connection speed

    sudo apt install iperf3

    Run the server in one device which will be listening for the client to establish a connection.

    iperf3 -s

    In your other network device install iperf3 and run the client against the server:

    iperf3 -c [server's ip address]

    Results should show up promptly

  • sshfs

    For an easy way to obtain temporary access to a directory in a remote location using the sshfs command just type in your terminal:

    sshfs remote_user@ip_address:/path_to_dir path_to_local_dir

    Make sure you have have already created the local directory to mount the remote directory, that you have the credentials of the remote user and all necessary permissions.

    For example:

    sshfs admin@192.168.1.130:/media/backup ~/nfs

    Now in your local file manager you will have access to the remote directory for the current session. Performance may be reduced with this method in contrast with other alternatives like a network file system setup but for managing small files it’s just perfect if you prefer to have a single secure connection to a remote location without having to use to much the terminal.

    NOTE: If you are a local non root user, you need to make sure to create the folder where you want to mount the remote disk somewhere in your home folder so you can have access to it either with CLI or a file explorer.

    To disconnect:

    fusermount -u /path/to/mount/point
  • Configure passwordless authentication

    Server Side

    1- In this scenario we are going to install an ssh server and configuring it so that it only accepts certificates to log in.

    sudo apt-get install openssh-server

    2- In the Remote Server: Ensure that password based ssh login is allowed in the ssh server configuration before copying your public key.. Edit the ssh configuration file after you have a working certificate based authentication. You should skip this step for now:

    sudo nano /etc/ssh/sshd_config

    Set the following options:

    PasswordAuthentication no
    ChallengeResponseAuthentication no
    UsePAM no
    KbdInteractiveAuthentication no

    Save and exit the file.

    sudo systemctl reload/restart sshd
    or
    sudo service ssh restart

    Client Side

    sudo apt-get install openssh-client

    Navigate to /home/.ssh

    3- Generate an SSH key pair (if you don\’t already have one. This command generates an RSA key pair with 4096 bits.

    ssh-keygen -t rsa -b 4096

    Or you can generate the more modern version with this command:

    ssh-keygen -t ed25519 -a 100 -f .ssh/testkey

    Give it a meaningful name and provide a password (optional)

    Add Your SSH Key to the SSH Agent: You need to add a new identity using your SSH private key to the SSH agent with the following command:

    ssh-add ~/.ssh/id_rsa (NOT the id_rsa.pub!)

    Ensure SSH Agent is Running: ssh-copy-id relies on an SSH agent to manage your keys. If you need to stop it, type eval \”$(ssh-agent -k)\”

    eval "$(ssh-agent -s)"
    Or
    eval $(ssh-agent -s)

    OPTIONAL: Make sure that ssh-agent is running and that will it start at system boot in your local session and adding a desired private key:

    nano ~/.bashrc

    4- Add the following line at the end of the file :

    eval "$(ssh-agent -s)"
    ssh-add PATH_TO_YOUR_PRIVATE_KEY

    To check if the SSH agent is running, you can use the ssh-add command with the -l option. If the ssh agent is running and has loaded any keys, you will see a list of the loaded key fingerprints. Open a terminal and run the following command:

    ssh-add -l

    Another way to check if the SSH agent is running, is to list the environment variables related to SSH.

    If the SSH agent is running, this command will print the path to the SSH agent socket. If it\’s not running, the command will produce no output. Run the following command:

    echo $SSH_AUTH_SOCK

    You can also see if ssh agent is running by showing it\’s PID.

    echo $SSH_AGENT_PID
    • There is another way to load the identities beside running the ssh agent and that is by creating a file named config inside the .ssh folder with the following information per server you want to connect to. The identities configured will be loaded at the time to try to connect via ssh.
    Host server
           Hostname server_ip_address
           User remote_user
           IdentityFile /home/local_user/.ssh/identity_file

    5- Make sure that ssh password authentication on your remote server is enabled. You\’ll need to copy your public key to the remote server using ssh-copy-id:

    ssh-copy-id -i /path/to/id_rsa.pub admin@remote_server_ip

    You are going to be prompted to type the password of your remote user to accept the public key.

    6- Once that\’s done, log in and if all goes well, you will connect to the remote machine without a password.

    ssh admin@remote_server_ip
  • Resize OpenWRT partition

    After OpenWrt installation on a 8GB sd card I noticed that I only had 104 MB of disk space left for future software installation. The file system was only using a fraction of the 8GB so I needed to expand the size of the partition as well as for the file system.

    Boot up your openwrt device and perform the following steps from CLI.

    First of all and just to be safe, remove all external disks attached.

    Install software (preferably via Luci):

    opkg lsblk parted resize2fs tune2fs

    Now lets gather information about block devices:
    lsblk
    sda                   179:0    0 8G   0 disk   
    ├─sda1                179:1    0   16M   0 part
    ├─sda2               179:2    0   104M  0 part /  

    Now lets enter to parted and Resize Partition

    parted
    p
    Number  Start   End     Size    Type      File system  Flags
    1      33.6M   50.3MB  16.8MB  primary   ext2         boot
    2      67.1MB  104MB   104MB   primary
    
    resizepart 2 8GB #Decide how much you want to expand according to sd card capacity
    q

    Resizing the file system

    Remount root as read only:

    mount -o remount,ro / 

    Remove reserved GDT blocks:

    tune2fs -O^resize_inode /dev/sda2

    Fix part, answer yes to all. This will remove GDT blocks remnants.

    fsck.ext4 /dev/sda2

    Now reboot, log back in again and then resize the partition:

    Expand root filesystem

    resize2fs -f /dev/sda2
    To apply changes, reboot  the system again and finish.

    Sources

    https://openwrt.org/docs/guide-user/installation/installation_methods/sd_card#fn

    https://openwrt.org/docs/guide-user/installation/openwrt_x86#resizing_filesystem

    https://openwrt.org/toh/friendlyarm/nanopi_r4s_v1#installation

  • Install Debian on RaspberryPi 3B+

    Go to https://raspi.debian.net/ and download the appropriate image file. I\’m going for this one: 20230612_raspi_3_bookworm.img.xz.

    Decompress the image:

    xz -d path/to/.img

    Copy image file to sdcard:

    sudo dd if=/path/to/.img of=/dev/sdx bs=4M status=progress conv=sync

    Insert the sdcard into your raspberrypi and start it up. First time run will get you prompted to user root without a password so you must give it a password right after login. Remote root login is disabled by default so in order to ssh into the raspberrypi create an admin account give it sudo privileges.\n\n\n\n

    Configure as root server-side

    Create a password for your root account

    passwd

    Update the system

    apt update && apt upgrade -y

    Create an admin account and provide a password

    adduser admin

    Install dependencies

    apt install sudo openssh-server

    Give sudo privileges to user admin by navigating to /etc/sudoers.d/ and either edit the README file or create a new file. Add the following line at the end of the file:\n\n\n\n

    admin ALL=(ALL:ALL) ALL

    Another way to setup sudo on a user is to add that user to the sudo group (you need to be root to do that).

    usermod -aG sudo admin

    Reboot the system and leave the raspberrypi without logging in locally with the root or admin accounts. From now on you should be able to log in remotely with your user admin and continue with further configurations.

    Take note of the ip address of your raspberrypi.

    ip a

    Configuration client-side

    Install open ssh client package.

    sudo apt install openssh-client

    Connect via ssh in your terminal.

    ssh admin@raspberrypi_ip_address

    Now you should be able to log in remotely with the admin account and continue with further configurations!

  • TOR Relay

    Recently I installed debian on a raspberrypi using a very minimalist version to maximize the usability of the raspberry pi 3B+ as it\’s limited in resources with only 1 Gb of RAM.
    as a good test for this board and also give a hand to the tor project.

    Install packges

    sudo apt install wget gpg apt-transport-https apt-config-auto-update unattended-upgrades apt-listchanges

    Configure unattended upgrades

    Edit file /etc/apt/apt.conf.d/50unattended-upgrades. Comment with // every line starting like this from:
    //Unattended-Upgrade::Origins-Pattern {
    to its end curly bracket
    //}
    Then add these lines following the commented section:

    Unattended-Upgrade::Allowed-Origins {\n \"${distro_id}:${distro_codename}-security\";\n \"TorProject:${distro_codename}\";\n };\n Unattended-Upgrade::Package-Blacklist {\n };

    Edit file /etc/apt/apt.conf.d/20auto-upgrades and add:

    APT::Periodic::Update-Package-Lists \"1\";
    APT::Periodic::Unattended-Upgrade \"1\";
    APT::Periodic::Autocleaninterval \"5\";
    APT::Periodic::verbose \"1\";

    Test the unattended upgrades:

    sudo unattended-upgrades -d

    Configure Tor repositories

    2. Create a new file in /etc/apt/sources.list.d/ named tor.list. Add the following entries:

    deb     [signed-by=/usr/share/keyrings/tor-archive-keyring.gpg] https://deb.torproject.org/torproject.org bookworm main\ndeb-src [signed-by=/usr/share/keyrings/tor-archive-keyring.gpg] https://deb.torproject.org/torproject.org bookworm main

    Then add the gpg key used to sign the packages
    Must be executed with root account as sudo might not work. Type exit once the command has finished working.

    su -
    sudo wget -qO- https://deb.torproject.org/torproject.org/A3C4F0F979CAA22CDBA8F512EE8CBC9E886DDD89.asc | gpg --dearmor | tee /usr/share/keyrings/tor-archive-keyring.gpg >/dev/null

    Install Tor

    sudo apt install tor deb.torproject.org-keyring

    Edit Tor configuration by editing the /etc/tor/torrc file and add the following lines:
    To test Tor for 1 month I\’ll assign 500 GB/month and check daily how its behaving the tor relay on my raspberry pi.

    Nickname    myNiceRelay  # Change \"myNiceRelay\" to something you like\nContactInfo your@e-mail  # Write your e-mail and be aware it will be published\nORPort      443          # You might use a different port, should you want to\nExitRelay   0\nSocksPort   0\n\n## BANDWIDTH\n## The config below has a maximum of 500GB (up/down) per month, starting on the 1st at midnight\nAccountingMax 500 GB\nAccountingStart month 1 0:00\n\n## MONITORING\nControlPort 9051\nCookieAuthentication 1\n
    sudo systemctl enable tor && sudo systemctl restart tor

    Verify it\’s running and enabled

    sudo systemctl status tor

    htop shows overall little resources consumption

    Optional

    Install nyx (sudo apt install nyx) to have a visual depiction of what\’s happening in your recently installed Tor relay.

    Sources

    https://support.torproject.org/apt/tor-deb-repo/

    https://community.torproject.org/relay/setup/guard/debian-ubuntu/updates/

    https://www.youtube.com/watch?v=tBnJRraXDc0\n